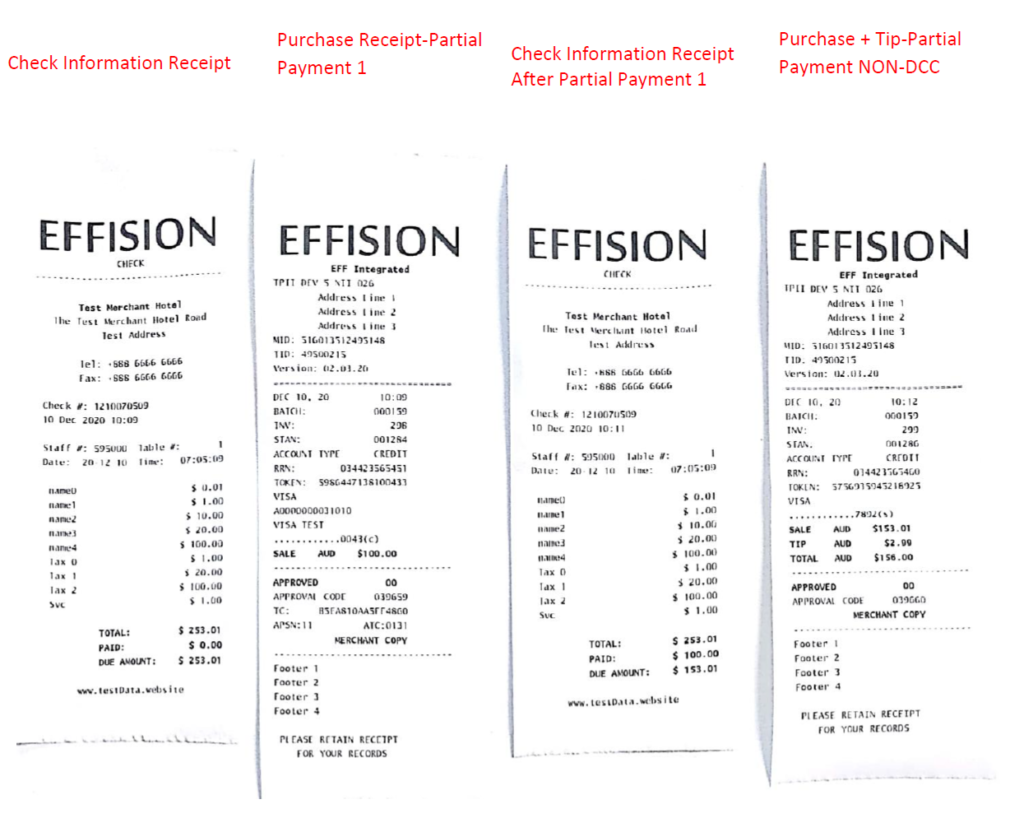
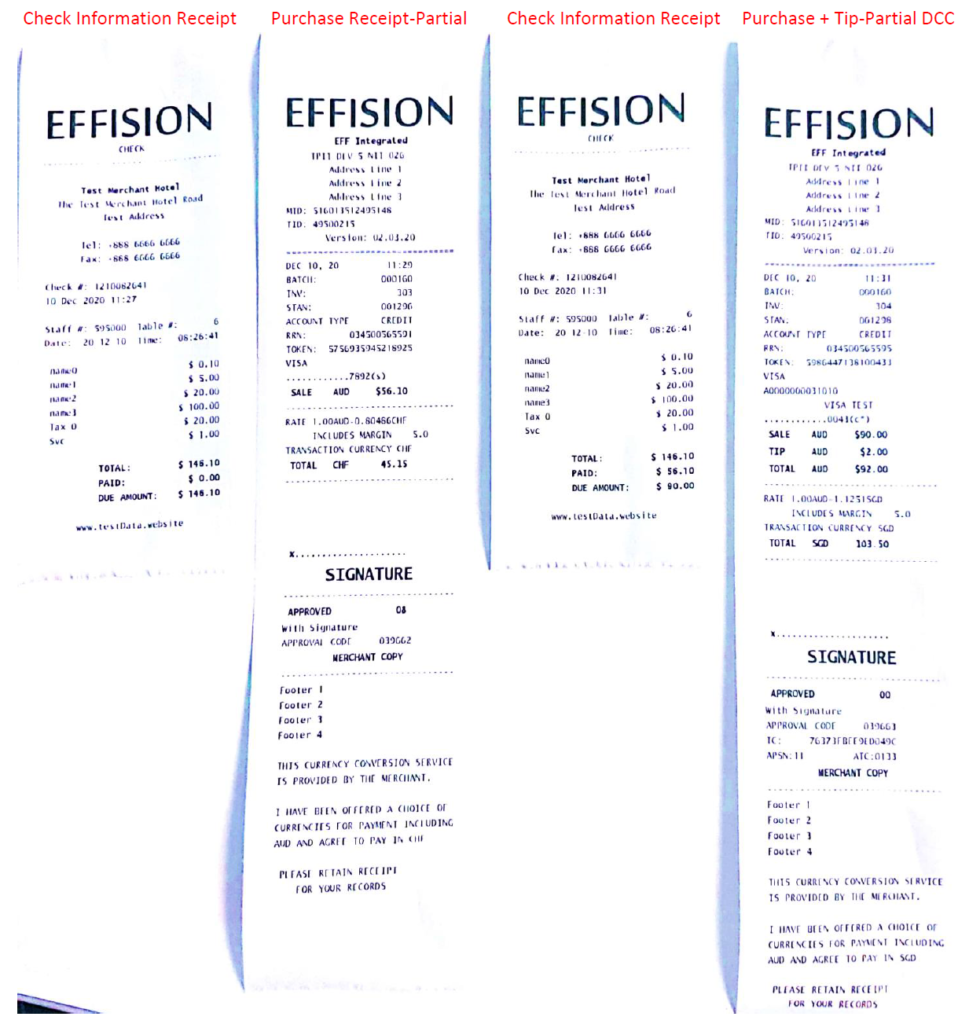
User Guide on how to initiate a Pay At Table transaction on the Ingenico Move 5000 integrated with Shiji Infrasys POS.
Initiating a Transaction
1. Choose Menu Option 1.

2. Terminal Prompts for Employee Login. Enter the same Employee ID that has been input through the POS system. Press Enter button/green button.

3. Enter the same Employee Password has been input through the POS system. Press Enter button/green button.

4. Enter the Table Number and press Table on the screen or the green (enter) button.

Note:
- The “Check” button is not currently supported. If the user selects the “Check” Button. The terminal will display declined prompt “Check not exist T1” or “Check_not_found_03” and will return to the table number prompt.
- If the Payment has been finalised. The terminal will display “DECLINED Table not Found T1” or “Check_not_found_03”.
5. Terminal displays the Check information. Press on the screen or press the green button to proceed.

6. Terminal displays the Table Check Receipt. Press on the screen or press the green button to proceed.

7. Terminal prompts for option to Print Check. Select Yes on the screen or press the green button to print the Check information receipt. Select No to proceed to payment.

Payment Method Options
- Total Payment
- Partial Payment
Total Payment
1. Terminal displays the Amount and Tip Prompt
2. Enter the tip (optional) or bypass the tip by pressing green/enter button.
3. Terminal displays Present Card prompt
4. Present the Card

5. For Visa /MasterCard “DCC Enabled” terminals the screen will display a DCC Prompt. Select the Amount in Foreign Currency for DCC Opt-in. Select Amount in AUD for DCC opt-out.
6. Terminal displays the PIN & Enter prompt. Enter the PIN or bypass the PIN to proceed.

7. Terminal processes the transaction and prints the receipt.
8. Terminal displays Approval prompt.

9. Terminal displays Signature Verify prompt. Select Yes or the green button.

10. Terminal displays Customer Copy. Press Yes or the green button to print the Customer Copy. Press the Cancel/red button to bypass.

Partial Payment
1. Terminal displays the Payment Method Selection prompt.

2. Select Partial.
3. Terminal displays the Enter Amount Prompt.
4. Press the Clear/yellow button on the terminal to enter the new partial amount.
5. Enter the partial amount. Partial amount should be less than the total amount.

6. Press the Enter/green button to proceed the payment.
7. Terminal displays the Present Card prompt.

8. Present the Card.
9. Terminal displays the PIN Enter prompt. Enter the PIN or bypass the PIN to proceed.
10. Terminal processes the transaction and prints the receipt.
11. Terminal displays Approval prompt.
12. Terminal display Signature Verify prompt. Press Yes or the green button.
13. Terminal displays Customer Copy. Press Yes or the Green Button to print the customer copy. Press the Cancel/red Button to bypass.
Reviewing the Due Amount after Partial Payment
1. Press the Grey Button.
2. Select Option 1 (Pay @Table).
3. Enter the Employee ID and Password
4. Enter Table Number. Press the Table button on the screen or press Enter button on the terminal.
5. Terminal displays the check information with the new due amount.

6. Press the Enter/green button to view the Check Information Receipt on the terminal.
7. Terminal displays the amount that has been paid and the new due amount that has been deducted with the previous partial payment.

8. If the order has been finalised or there is no outstanding due amount, the user can view the check information by entering the check number on the Enter Check/Table prompt. The terminal will display the order with the total amount being $0.00. The terminal will not allow the user to print the receipt and instead will display the error “Declined Zero Amount, Not allowed to Process”.

>

Receipt Samples


